
Recommended Cut Settings & Guidelines
But where do you start?
The short answer is: there’s no one-size-fits-all setting. Laser cutting (especially with acrylic) has a lot of nuance.
We’ve pulled together a list of starter settings crowdsourced from the amazing Acrylic Obsessed Facebook Group to give you a solid jumping-off point. These are not set in stone, but they’ll help you get your feet wet.
A few tips as you test:
- If your material isn’t cutting all the way through (and your focus is correct), try increasing your power and lowering your speed. Adjust in increments of 5.
- If your cuts are burning or melting, go the opposite direction: lower your power and increase your speed.

A Few Other Things Worth Noting
5/32" Chunky Party Line: PG Medium Black with 2 passes. These are not suited for super detailed cuts.
1/8" Pattern Sheets & Printed Two Tone: Cut on PG Medium, selecting either Clear, Black, or White to match the base you are cutting. Engrave on 1000 Speed and 40 Power. If your print has a paper masking, that side should be facing your honeycomb tray (pattern side up). If you have printing on both sides, raise your acrylic off the bed using scrap material.
1/4" Thick Acrylic: Recommended settings: 5 / 60 / 60 (Omtech Polar)
Prev post
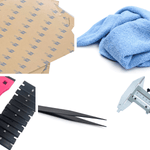
Must Have's for working with acrylic- A Beginner's Guide
Updated on 31 December 2023


4 comments
Can my xtool f1 cut this acrylic?
Does this acrylic need To be masked to cut?
Is this Cast Acrylic? Will the xTool M1 10W Diode Laser cut this material?
Thank you for your assistance.
What is the recommended time/temp for the gloss white sublimation acrylic?